**This is an old revision of the document!**
LineageOS 18.1/Trebuchet Custom Font
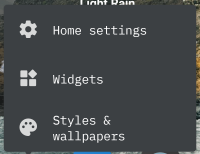
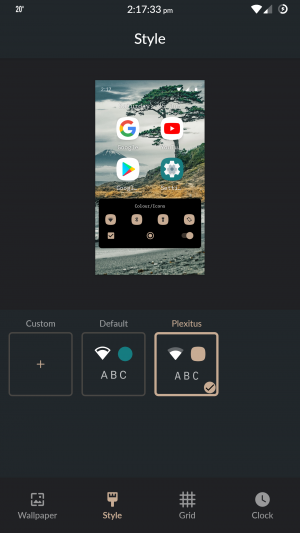
Since LineageOS 17 there's something called «Styles & Wallapers». I don't how it works on other ROM's, but in LineageOS 18.1, at least, it lets you change (among other stuff) the operating system font.
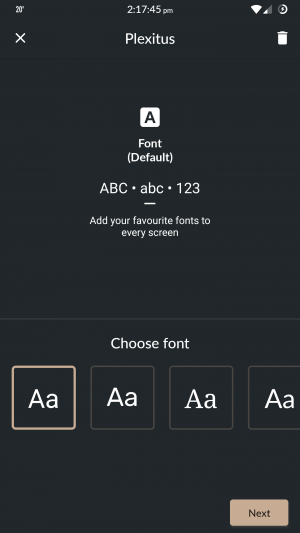
However, the default options (currently Android default, Noto Sans, Rubik and Lato) might not be of your taste. Personally, I wanted to use IBM Plex, so that's what I'm using as example. With some tweaking, I think it can work for any fonts you might want to use.
Before we start, make sure you have the tools to work with. In our particular case, ADB, for sure, but also build-tools of Android SDK. On Debian-based operating systems, you can install them using the following command: apt install android-sdk-build-tools android-sdk-platform-tools. Also, make sure you can run ADB as root (adb root & adb shell). The phone's root filesystem must also be writable (mount -o remount,rw /).
So, the first thing we should do is to copy those fonts to the phone. Again, I don't know about other ROMs, but, in our case, it suffices to adb push the TTF's (or OTF's) to /system/product/fonts. Preferably, you will end up with a list like this:
hero2ltexx:/system/product/fonts # ls -lahtr
total 10M
-rw-r--r--  1 root root 137K 2008-12-31 22:00 Rubik-Regular.ttf
-rw-r--r--  1 root root 142K 2008-12-31 22:00 Rubik-MediumItalic.ttf
-rw-r--r--  1 root root 140K 2008-12-31 22:00 Rubik-Medium.ttf
-rw-r--r--  1 root root 140K 2008-12-31 22:00 Rubik-Italic.ttf
-rw-r--r--  1 root root 143K 2008-12-31 22:00 Rubik-BoldItalic.ttf
-rw-r--r--  1 root root 140K 2008-12-31 22:00 Rubik-Bold.ttf
-rw-r--r--  1 root root 576K 2008-12-31 22:00 Lato-Regular.ttf
-rw-r--r--  1 root root 679K 2008-12-31 22:00 Lato-MediumItalic.ttf
-rw-r--r--  1 root root 621K 2008-12-31 22:00 Lato-Medium.ttf
-rw-r--r--  1 root root 629K 2008-12-31 22:00 Lato-Italic.ttf
-rw-r--r--  1 root root 604K 2008-12-31 22:00 Lato-BoldItalic.ttf
-rw-r--r--  1 root root 574K 2008-12-31 22:00 Lato-Bold.ttf
drwxr-xr-x 10 root root 4.0K 2008-12-31 22:00 ..
[...]
-rw-r--r--  1 root root 113K 2022-06-25 13:07 IBMPlexMono-Bold.ttf
-rw-r--r--  1 root root 119K 2022-06-25 13:07 IBMPlexMono-BoldItalic.ttf
-rw-r--r--  1 root root 119K 2022-06-25 13:07 IBMPlexMono-Italic.ttf
-rw-r--r--  1 root root 112K 2022-06-25 13:07 IBMPlexMono-Medium.ttf
-rw-r--r--  1 root root 119K 2022-06-25 13:07 IBMPlexMono-MediumItalic.ttf
-rw-r--r--  1 root root 111K 2022-06-25 13:07 IBMPlexMono-Regular.ttf
[...]
Ideally, you must copy Bold, Regular and Medium (with their respective Italic variations), because that what seems easier to deal with. But your mileage my vary and you may also want to play a little with font sizes.
After copying those fonts over to the cellphone, you'll soon notice they still don't appear at the screens I've showed atop. Yes, there are some additional steps.
Next up, we must edit a /system/product/etc/fonts-costumization.xml file:
<?xml version="1.0" encoding="utf-8"?>
<fonts-modification version="1">
    <family customizationType="new-named-family" name="lato">
        <font weight="400" style="normal">Lato-Regular.ttf</font>
        <font weight="400" style="italic">Lato-Italic.ttf</font>
        <font weight="500" style="normal">Lato-Medium.ttf</font>
        <font weight="500" style="italic">Lato-MediumItalic.ttf</font>
        <font weight="700" style="normal">Lato-Bold.ttf</font>
        <font weight="700" style="italic">Lato-BoldItalic.ttf</font>
    </family>
    <alias name="lato-medium" to="lato" weight="500" />
    <alias name="lato-bold" to="lato" weight="700" />

    <family customizationType="new-named-family" name="rubik">
        <font weight="400" style="normal">Rubik-Regular.ttf</font>
        <font weight="400" style="italic">Rubik-Italic.ttf</font>
        <font weight="500" style="normal">Rubik-Medium.ttf</font>
        <font weight="500" style="italic">Rubik-MediumItalic.ttf</font>
        <font weight="700" style="normal">Rubik-Bold.ttf</font>
        <font weight="700" style="italic">Rubik-BoldItalic.ttf</font>
    </family>
    <alias name="rubik-medium" to="rubik" weight="500" />
    <alias name="rubik-bold" to="rubik" weight="700" />

    <family customizationType="new-named-family" name="ibmplexmono">
        <font weight="400" style="normal">IBMPlexMono-Regular.ttf</font>
        <font weight="400" style="italic">IBMPlexMono-Italic.ttf</font>
        <font weight="500" style="normal">IBMPlexMono-Medium.ttf</font>
        <font weight="500" style="italic">IBMPlexMono-MediumItalic.ttf</font>
        <font weight="700" style="normal">IBMPlexMono-Bold.ttf</font>
        <font weight="700" style="italic">IBMPlexMono-BoldItalic.ttf</font>
    </family>
    <alias name="ibmplexmono-medium" to="lato" weight="500" />
    <alias name="ibmplexmono-bold" to="lato" weight="700" />
</fonts-modification>
Note the last family entry. Change that accordingly.
The font is now installed. But, unless we deploy what's called an overlay, the font still won't appear on Styles & Wallpapers. So, there's still a last (and rather dull) step to go.
LineageOS project is opensource, so we can clone their overlays repository: git clone https://github.com/LineageOS/android_packages_overlays_Lineage. What interests us is, obviously, inside fonts folder. You can copy any of the Font*Overlay subfolders to src (or whatever you want to call it, but src is more convenient because we're going to run a script which «compiles» that overlay.
Inside src there are some files and folders. Go through them and change them as per needed. Here's mine, for reference: src-ibmplex.tar.gz.
Now, we must generate the overlay APK file. For that, I modified a script written by the GitHub user Kolodez2106. As we don't need to compile anything, javac won't – God bless! – cross our paths, but we're still going to need jarsign, so Java must be installed. The shell script goes more or less as follows:
#!/bin/bash

rm -v -f -r ./obj
rm -v -f -r ./bin
rm -v -f -r ./key
mkdir ./obj
mkdir ./bin
mkdir ./key
aapt package -v -f -m -S ./src/res/ -M ./src/AndroidManifest.xml -I /usr/lib/android-sdk/platforms/android-23/android.jar # you may need to replace "/usr/lib/android-sdk/platforms/android-23/android.jar" here and in the subsequent commands
aapt package -f -M ./src/AndroidManifest.xml -S ./src/res/ -I /usr/lib/android-sdk/platforms/android-23/android.jar -F ./bin/FontIBMPlexMonoOverlay.unsigned.apk ./bin # it is important that the ./bin/ directory does not contain any files except for classes.dex when this command starts
keytool -genkeypair -validity 10000 -dname "CN=YOURNAME, OU=YOURNAME, O=YOURNAME, C=YOURCOUNTRY" -keystore ./key/mykey.keystore -storepass mypass -keypass mypass -alias myalias -keyalg RSA
jarsigner -keystore ./key/mykey.keystore -storepass mypass -keypass mypass -signedjar ./bin/FontIBMPlexMonoOverlay.signed.apk ./bin/FontIBMPlexMonoOverlay.unsigned.apk myalias
zipalign -f 4 ./bin/FontIBMPlexMonoOverlay.signed.apk ./bin/FontIBMPlexMonoOverlay.apk
If you're using Windows or any UNIX flavor which simply stores that stuff in a different place I can't help you much, but you can create a Batch or a modified shell script with not much effort, because those are the commands you need.
After running the script, you'll end up with the file bin/FontIBMPlexMonoOverlay.apk. Run adb shell and create a folder at /system/product/overlay called something like LineageIBMPlexMonoFont (I called mine that to follow the standard dictated by the other folder names). Exit the shell and then run adb push bin/FontIBMPlexMonoOverlay.apk /system/product/overlay/LineageIBMPlexMonoFont.
After restarting your phone, you should be able to pick the font at Styles & Wallpapers.


